
What this covers: Uploading your own image and video files into your Library so you can add them to a loop. An asset is any piece of content you can put on screen; your Library is where all of your assets are stored.
Before you start: Have your files ready. Screenfluence accepts:
- Images: JPG, PNG, GIF (and other common image formats)
- Videos: MP4, M4V, MKV
- Files up to 2 GB each.
iPhone videos: iPhones record in .mov format, which the uploader doesn't accept. Convert the video to .mp4 first — free converters like HandBrake, or your Mac's iMovie export, do this in a couple of clicks.
Steps
- Click Library in the left sidebar.
- Click the green New Asset button in the top-right corner.
- In the New Asset window, choose the Upload Media panel.
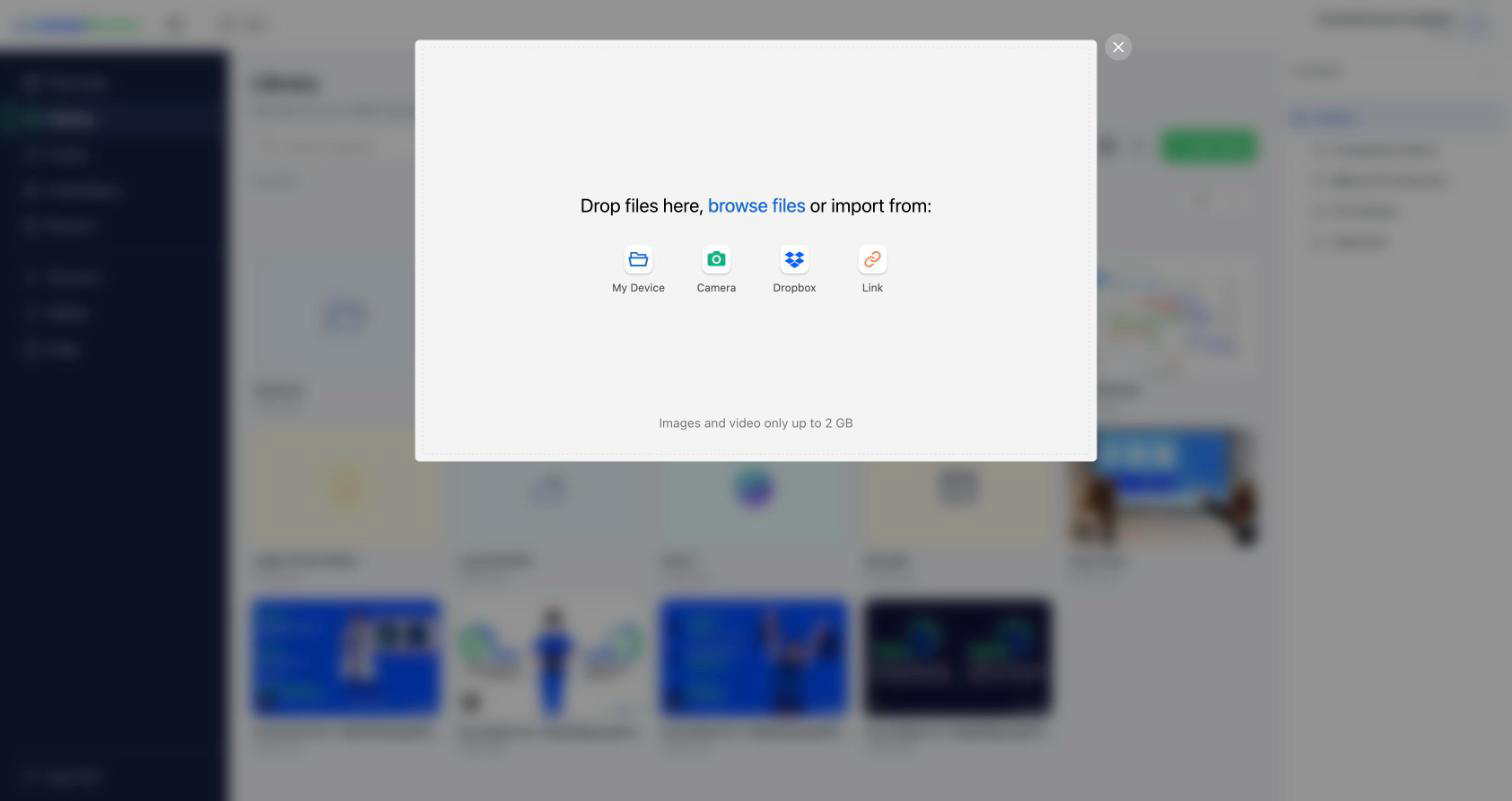
- The upload window opens — "Drop files here, browse files or import from:" — with the note "Images and video only up to 2 GB." Add your files any of these ways:
- Drag and drop them anywhere in the window,
- Click browse files to pick them from your computer (My Device), or
- Import from Camera, Dropbox, or Link (a direct web address to a file).
- When your files are listed — up to 20 per upload — start the upload.
- When it finishes, your files appear in the Library, ready to drag into a loop (see How to build a loop).
Tips & good to know
- Design content for your screen's shape: 1920×1080 works best for standard landscape screens (see Media Recommendations for sizing advice).
- Uploaded assets land in whichever folder you had open — open a folder first to upload straight into it.
- After uploading, hover an asset and click Edit to rename it, set its orientation, or add search tags (see Organizing your library).
Troubleshooting
- A file won't add to the upload window: its format isn't accepted. Convert videos to MP4 (this includes .mov files from iPhones) and images to JPG or PNG, then try again.
- The upload fails partway: check your internet connection and try again; very large video files take a while.
- A file is over 2 GB: compress the video or split the content — 2 GB is the per-file ceiling.