
What this covers: Creating a Google Slides asset — a smart asset that plays a Google Slides presentation on your screen and stays up to date when you edit the presentation. A smart asset is content Screenfluence generates for you from another service.
Before you start: Your presentation ready in Google Slides.
Part 1 — Publish your presentation in Google Slides
- Open your presentation and go to File > Share > Publish to web.
- Under Auto-advance slides, choose how long each slide shows.
- Tick Start slideshow as soon as the player loads and Restart the slideshow after the last slide.
- Click Publish and confirm.
- Copy the link Google gives you.
Part 2 — Add it in Screenfluence
- Click Library in the left sidebar, then the green New Asset button.
- In the New Asset window, click Get Started under Create a Smart Asset.
- Select Google Slides ("Embed a Google Slides presentation on your screens. Ensure presentation sharing is enabled.") and continue.
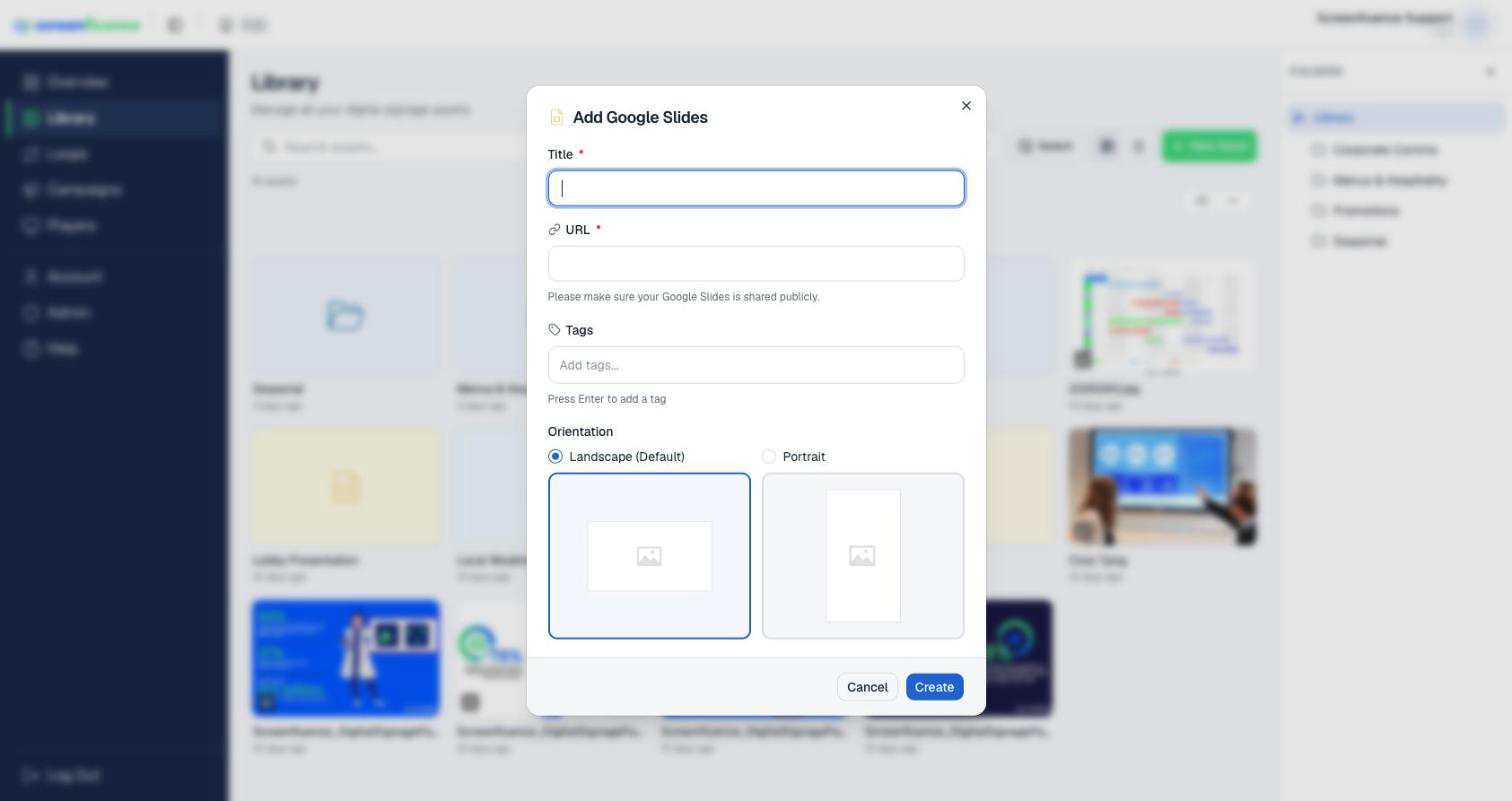
- In the Add Google Slides window, fill in a Title and paste the published link into URL — the form reminds you to make sure your presentation is shared publicly. (Tags and Orientation are optional.)
- Click Create. Screenfluence checks the link right away: if the presentation isn't shared, you'll see "Please share your Google Slide" — repeat Part 1 and save again. Once accepted, the asset appears in your Library, ready to drag into a loop (see How to build a loop).
Tips & good to know
- Edits you make in Google Slides flow to your screen automatically — no need to re-add the asset.
- Design your slides at 16:9 for standard landscape screens so they fill the display.
Troubleshooting
- "Please share your Google Slide" when saving: you copied the browser address instead of the published link — repeat Part 1 and use the link from the Publish to web dialog.
- Slides don't advance: revisit Publish to web and set Auto-advance slides; without it, the deck sits on slide 1.