
What this covers: How to create a loop, add content to it, set how long each slide stays on screen, preview it, and edit it later. A loop is a sequence of slides — pictures, videos, and other assets — that plays on your screen on repeat.
Before you start: You'll need at least one asset in your Library (see Add an asset to your library). An asset is any piece of content you can put on screen, such as an image, video, PDF, or a smart asset like a website or Google Slides presentation.
Create the loop
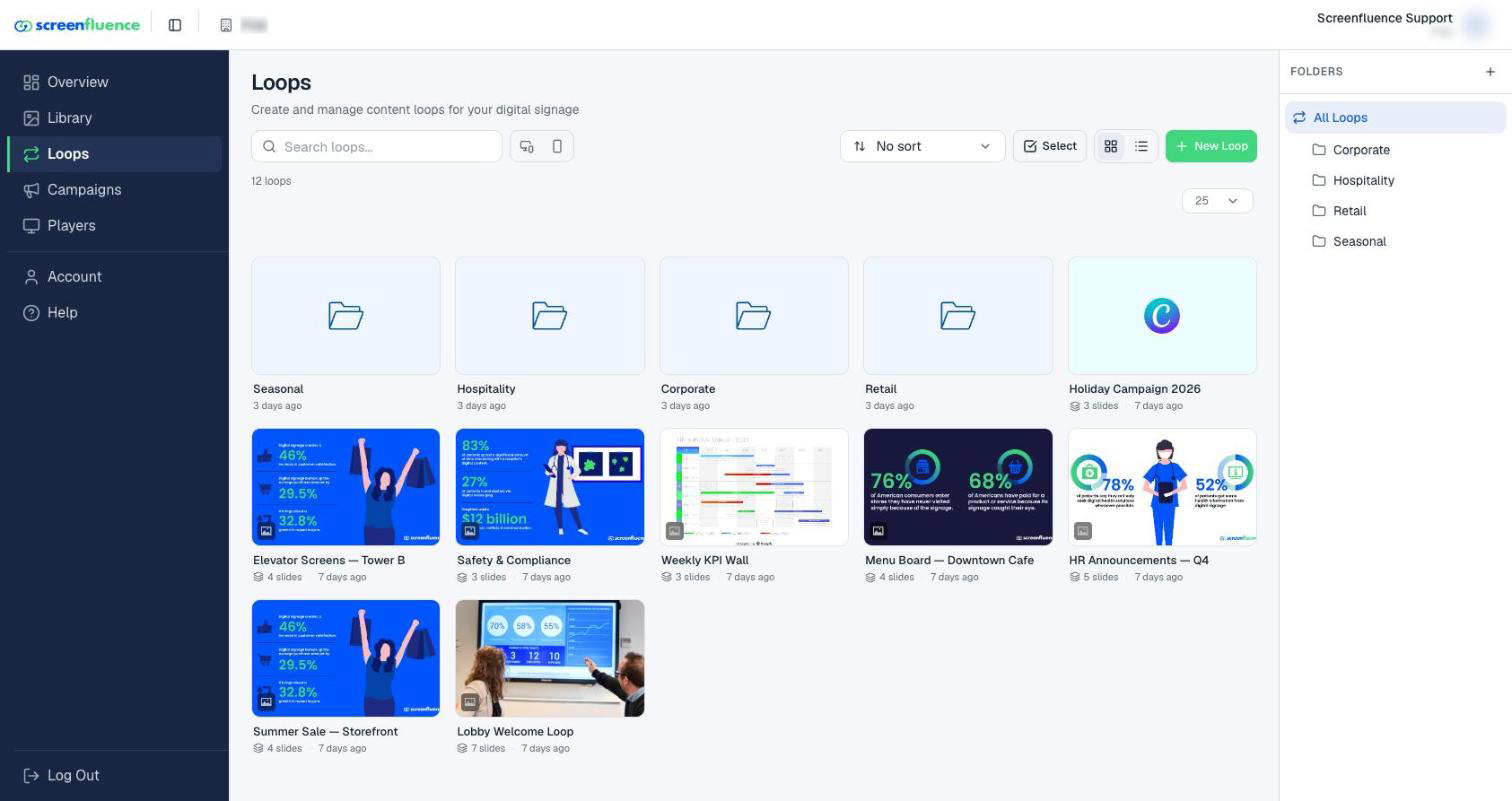
- Click Loops in the left sidebar.
- Click the green New Loop button in the top-right corner.
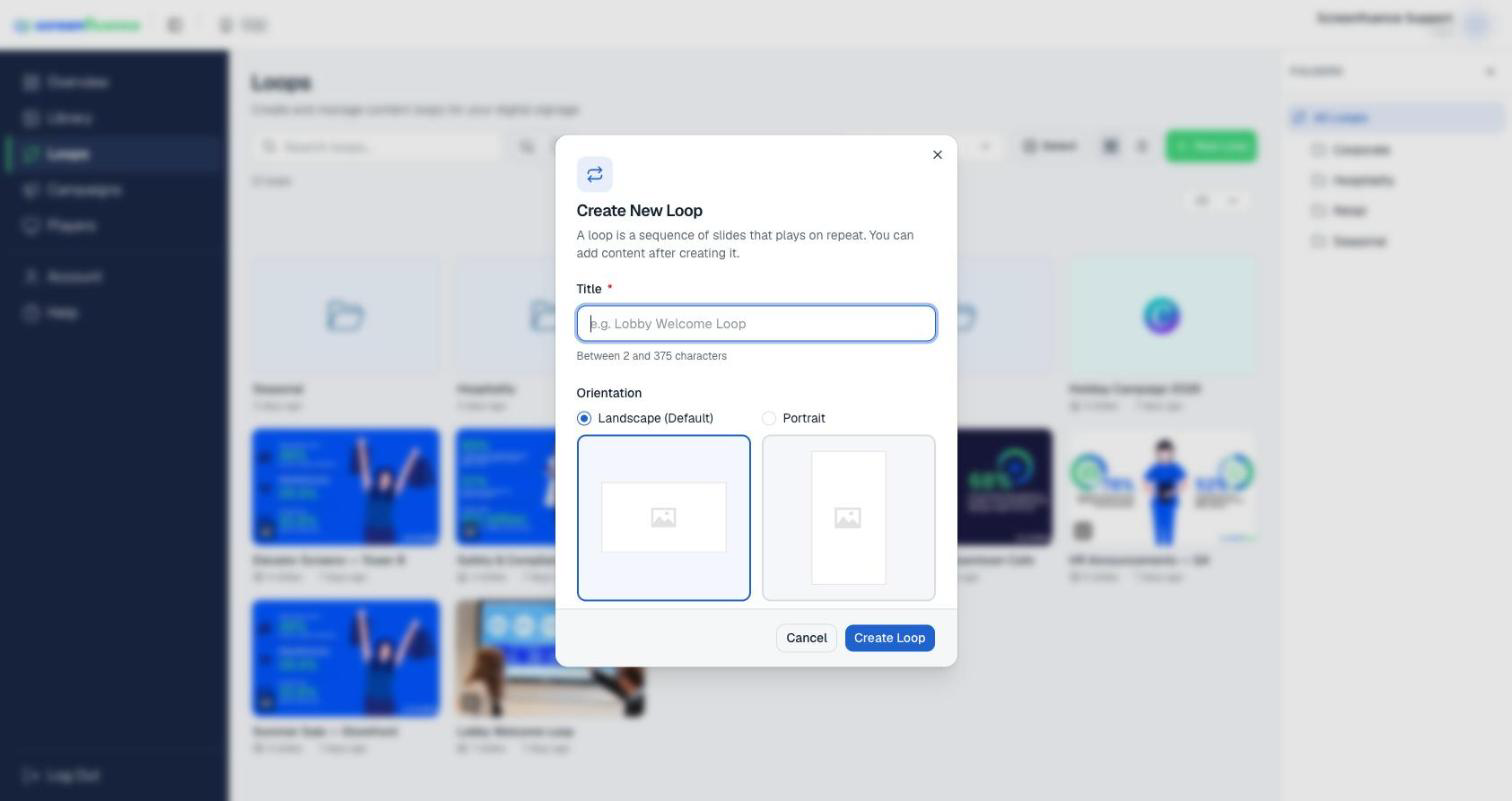
- In the Create New Loop window ("A loop is a sequence of slides that plays on repeat. You can add content after creating it."), type a Title — for example, "Lobby Welcome Loop".
- Choose an Orientation: Landscape (Default) for screens mounted the normal way, or Portrait for screens turned on their side. The loop's orientation should match the screen it will play on.
- Click the blue Create Loop button. You'll see "Created loop successfully!", and the loop editor opens automatically.
Add content to your loop
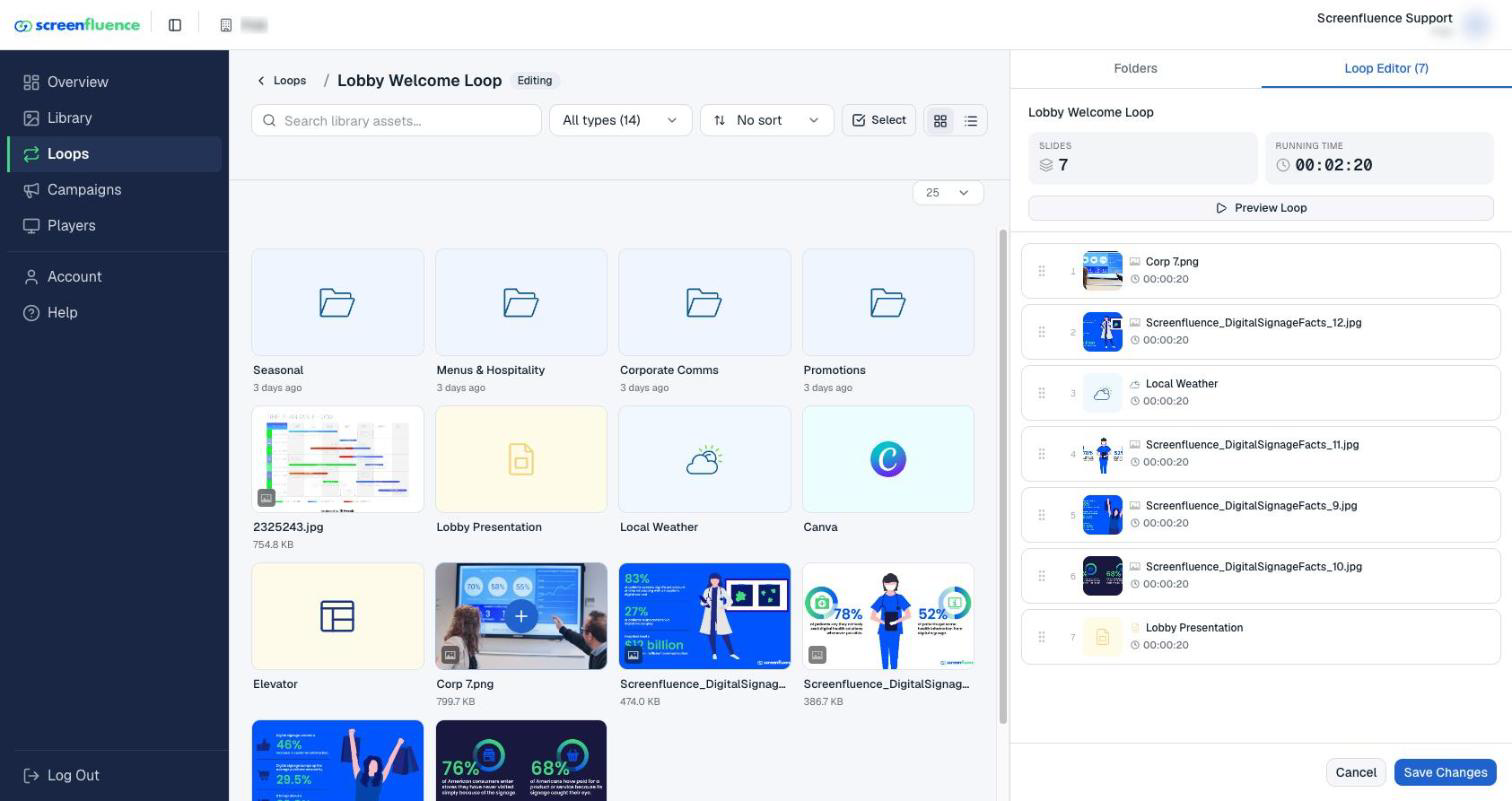
The editor shows your Library on the left and your loop on the right, with two tabs above it: Folders and Loop Editor.
- Find the content you want to add — type in the Search library assets... box, or browse your folders on the Folders tab.
- Click an asset (or drag it) to add it to the loop. An empty loop says "No slides yet — Click or drag assets from the left to add them to this loop".
- To add several at once, use Select mode and click Add to loop (the editor's own tip: "Use Select mode to add multiple at once").
- Reorder slides by dragging them; remove one with Remove slide.
- Click Save Changes. You'll see "Saved loop successfully!" and return to the Loops page.
Set how long each slide plays
- Each slide shows its duration in seconds ("sec") — click the number ("Click to edit") and type a new one.
- Videos play their full length automatically — their row is marked "Video duration (read-only)".
- The Running Time at the top shows the total length of one pass through the loop.
Preview your loop
- In the editor, click Preview Loop to watch the loop play exactly as it will on screen, with a Fullscreen option and a slide counter. The button is disabled until you've saved — "Save your changes first to preview".
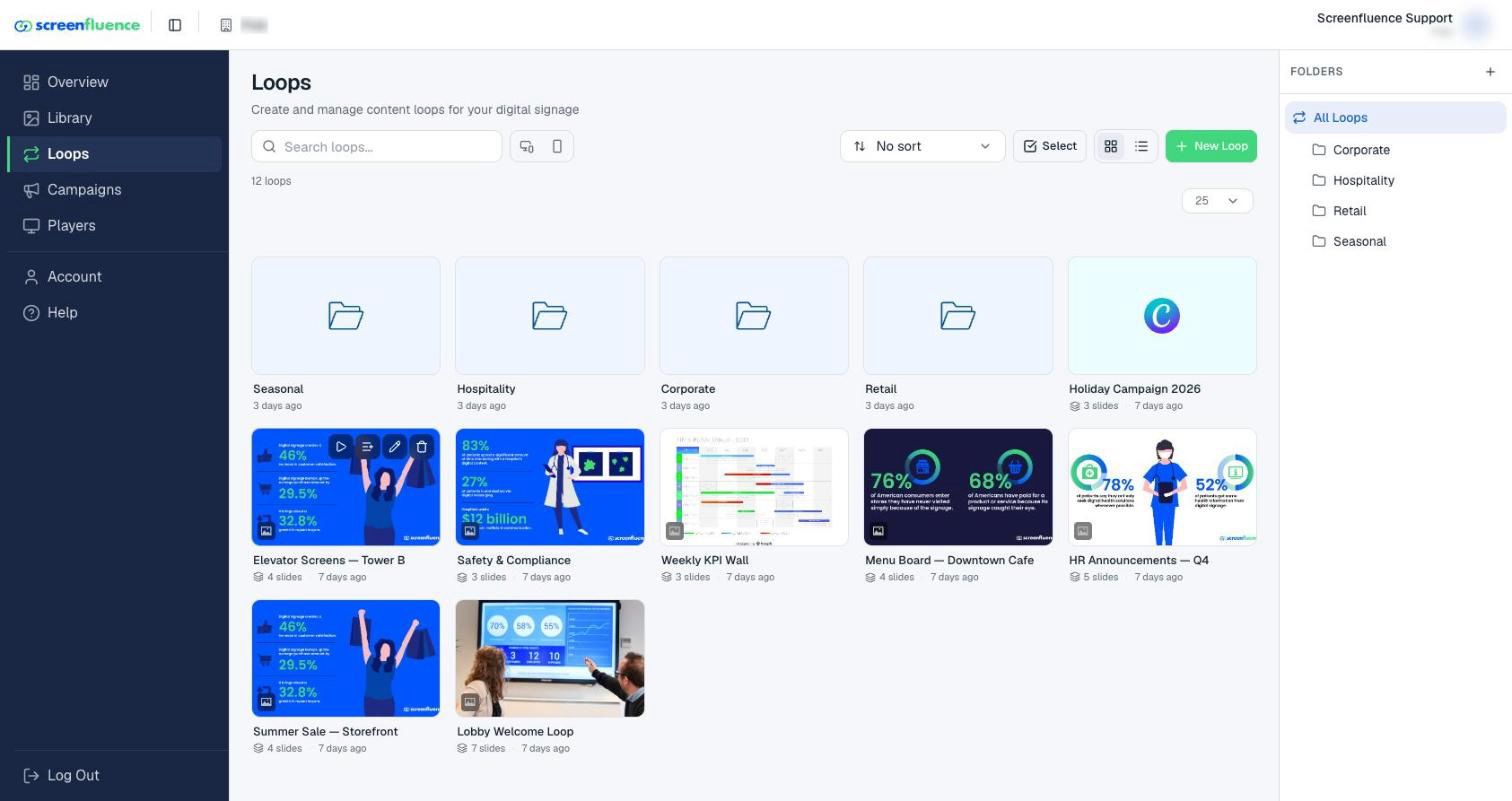
- From the Loops page, hover over a loop and click Preview anytime.
Hovering over a loop also gives you Edit contents (reopen the editor), Edit (the Edit Loop window — change the Title, Orientation, or Tags; its sidebar also offers Clone Loop and shows Last Updated), and Delete.
Editing a loop that's already on screen
You can edit a loop at any time — even one playing in an active campaign. After Save Changes, your screens pick up the change automatically a short while later. You don't need to re-publish anything.
Tips & good to know
- A loop's orientation must match the campaign it's used in — the campaign editor enforces this.
- Leaving the editor with unsaved edits warns you first — an Unsaved changes dialog ("Changes you made may not be saved") lets you go back and save.
- On a tablet or phone, the slide panel opens via the Loop Editor button at the top, and each slide gets up/down arrows for reordering instead of drag.
- If a teammate is working at the same time, the editor tells you: a "Loop updated" notice means someone else just saved this loop — choose Refresh to load their changes or Keep editing to continue with yours. An "Asset removed" notice means an asset in this loop was deleted and will drop out of the loop.
Troubleshooting
- A warning says you're attempting to use an asset "not supported by the following players": that asset type is an advanced feature those player models don't support. Call Screenfluence at (844) 772-7336 about upgrading.
- Preview Loop is grayed out: save first — "Save your changes first to preview".
- Your changes don't appear on screen: make sure you clicked Save Changes, then allow a little time for the player to update. If the screen still doesn't change, check that the player is online (see Checking player status).