
What this covers: Grouping players so you can manage several screens as one — a player group holds a set of players and a shared campaign, so updating the group updates every screen in it.
Before you start: At least two players on your account, all in the same orientation.
Create a group
- Click Players in the left sidebar, then open the Groups tab.
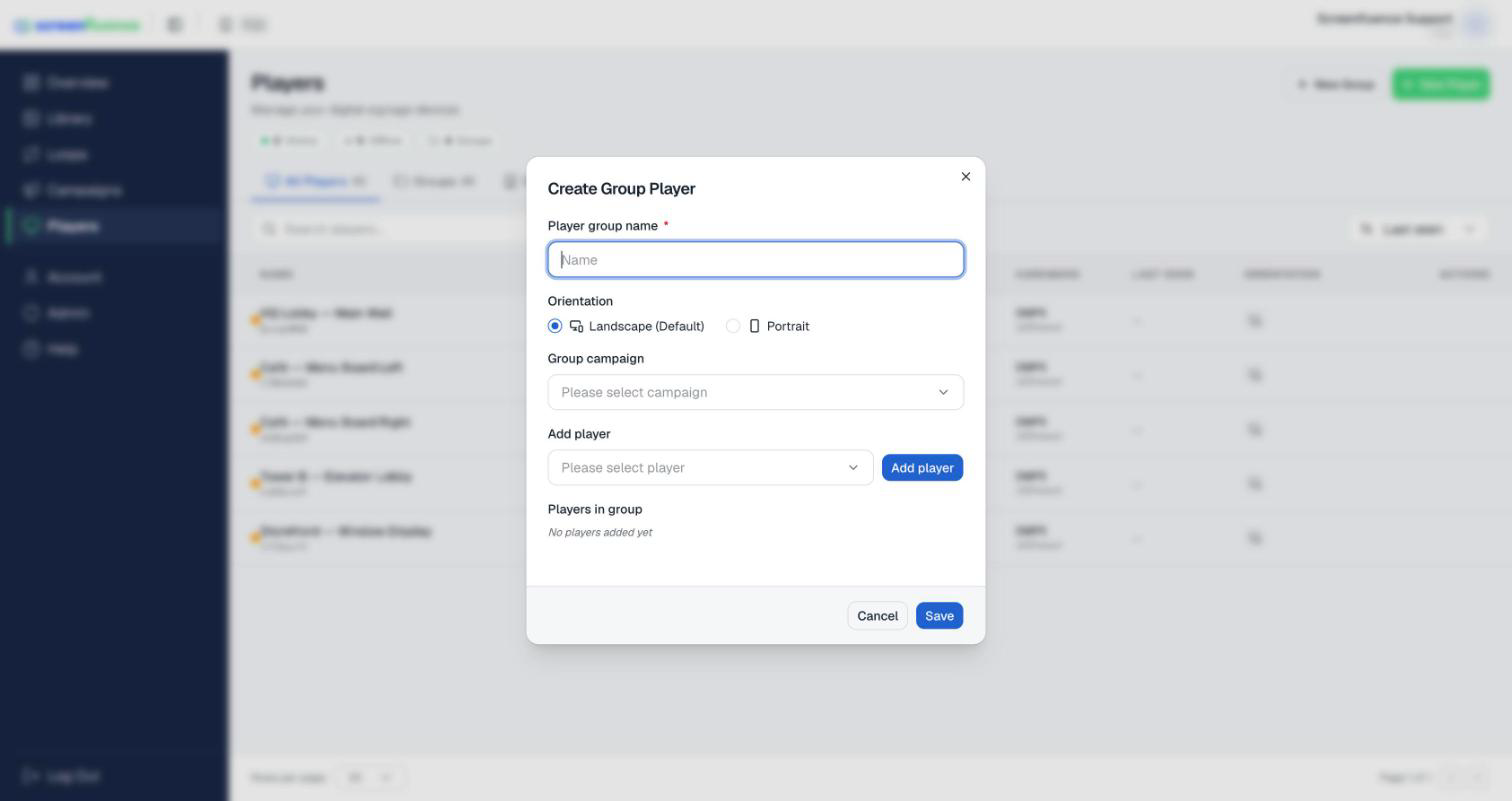
- Click the button to create a group — the Create Group Player window opens.
- Enter a Player group name and choose the Orientation — Landscape (Default) or Portrait.
- Pick the Group campaign the whole group should play ("Please select campaign").
- Under Add player, pick each player ("Please select player") and click Add player; they collect under Players in group (empty until then: "No players added yet").
- Click Save (or Cancel to discard). You'll see "Created … successfully!", and the group appears in the Groups tab.
Managing groups
- The Groups tab lists your groups with their campaigns and players (empty state: "No groups yet — Create a group to organize players for bulk campaign assignment.").
- Edit a group to add or remove players or switch its Group campaign — every screen in the group follows shortly after you save.
Tips & good to know
- Groups shine for identical screens: a menu across five locations, or a promo wall — one campaign change updates them all.
- A player follows its group's campaign — to give one screen different content, remove it from the group and assign it individually (see How to put a campaign on your screen).
Troubleshooting
- A player won't add to the group: groups are single-orientation — all players in a group must match. Check the player's Orientation column on the Players page.
- A screen in the group isn't updating: check that player's status dot on the Players page (see Checking player status).