Using SSO (Single-Sign On) with Screenfluence is available to enterprise clients only. In order to enable SSO please call Screenfluence Support to initiate the process.
If your identity provider is Azure Active Directory, the following instructions will allow you to make the required configurations on your side, before a Screenfluence sales engineer can enable your account for SSO.
Add Application to Azure AD
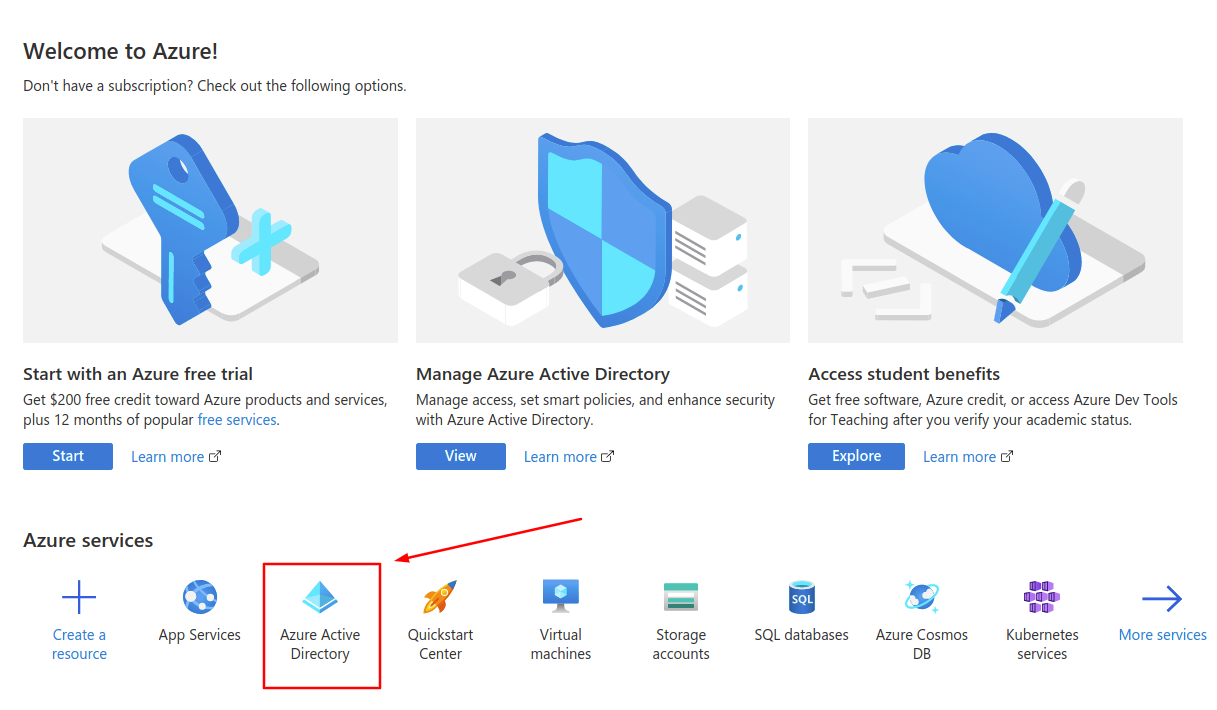
Log in to the portal.azure.com with the account for the organization you will be connecting.
- Select Azure Active Directory
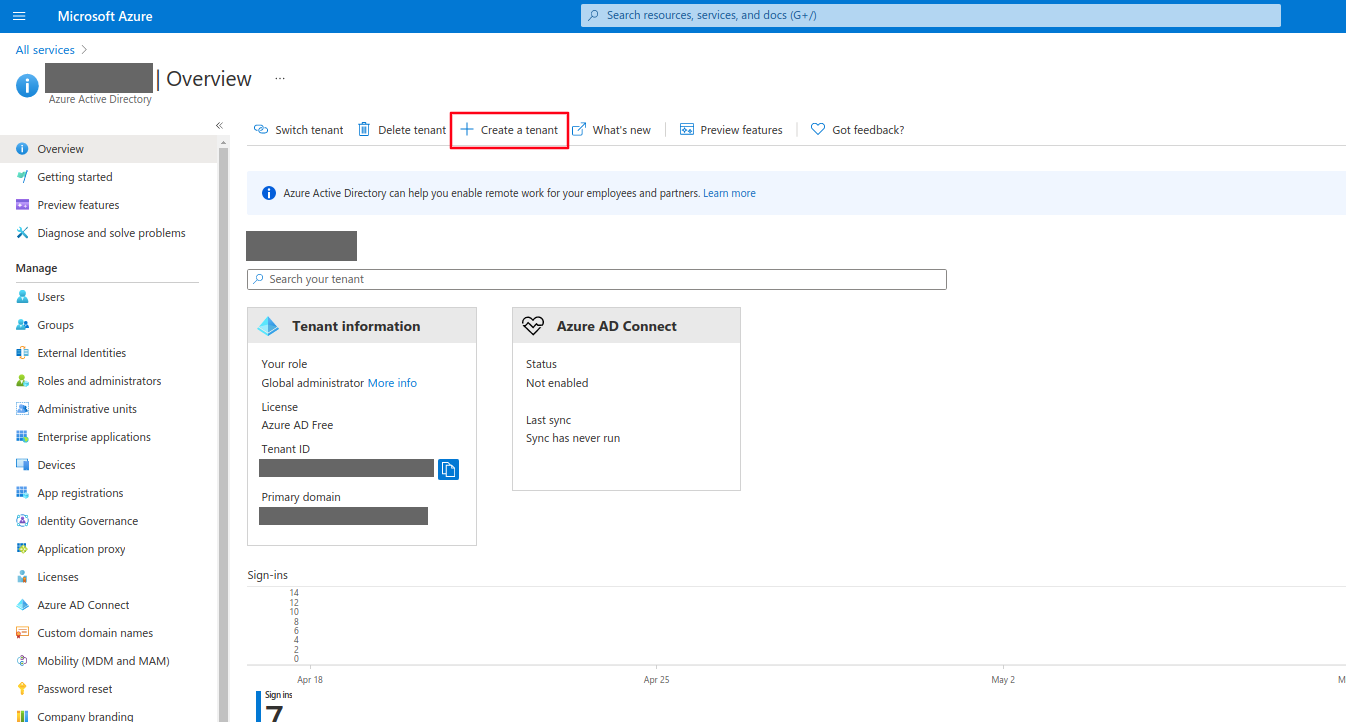
2. Click on Create a tenant
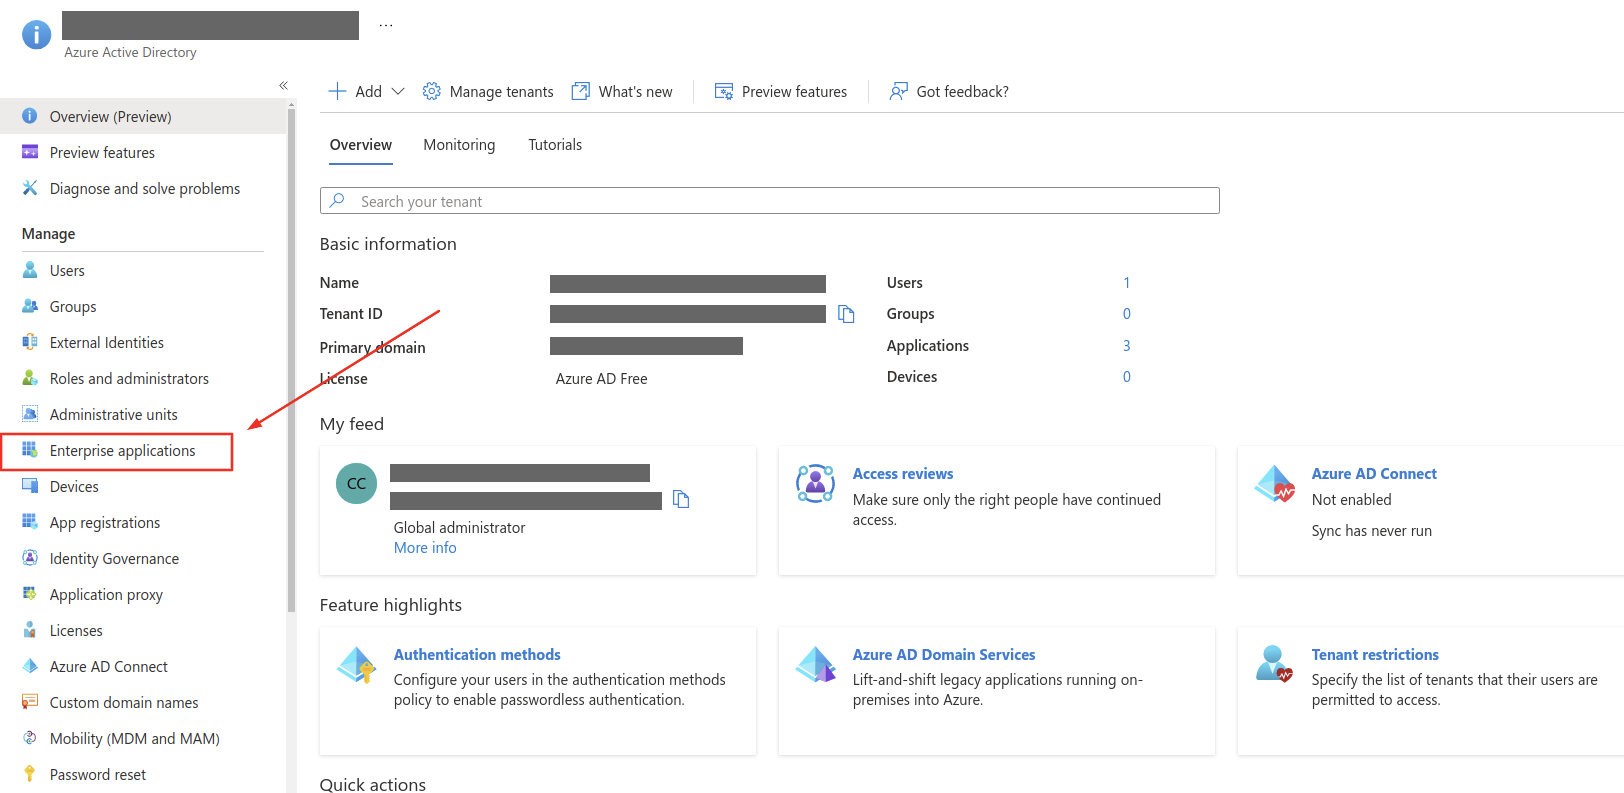
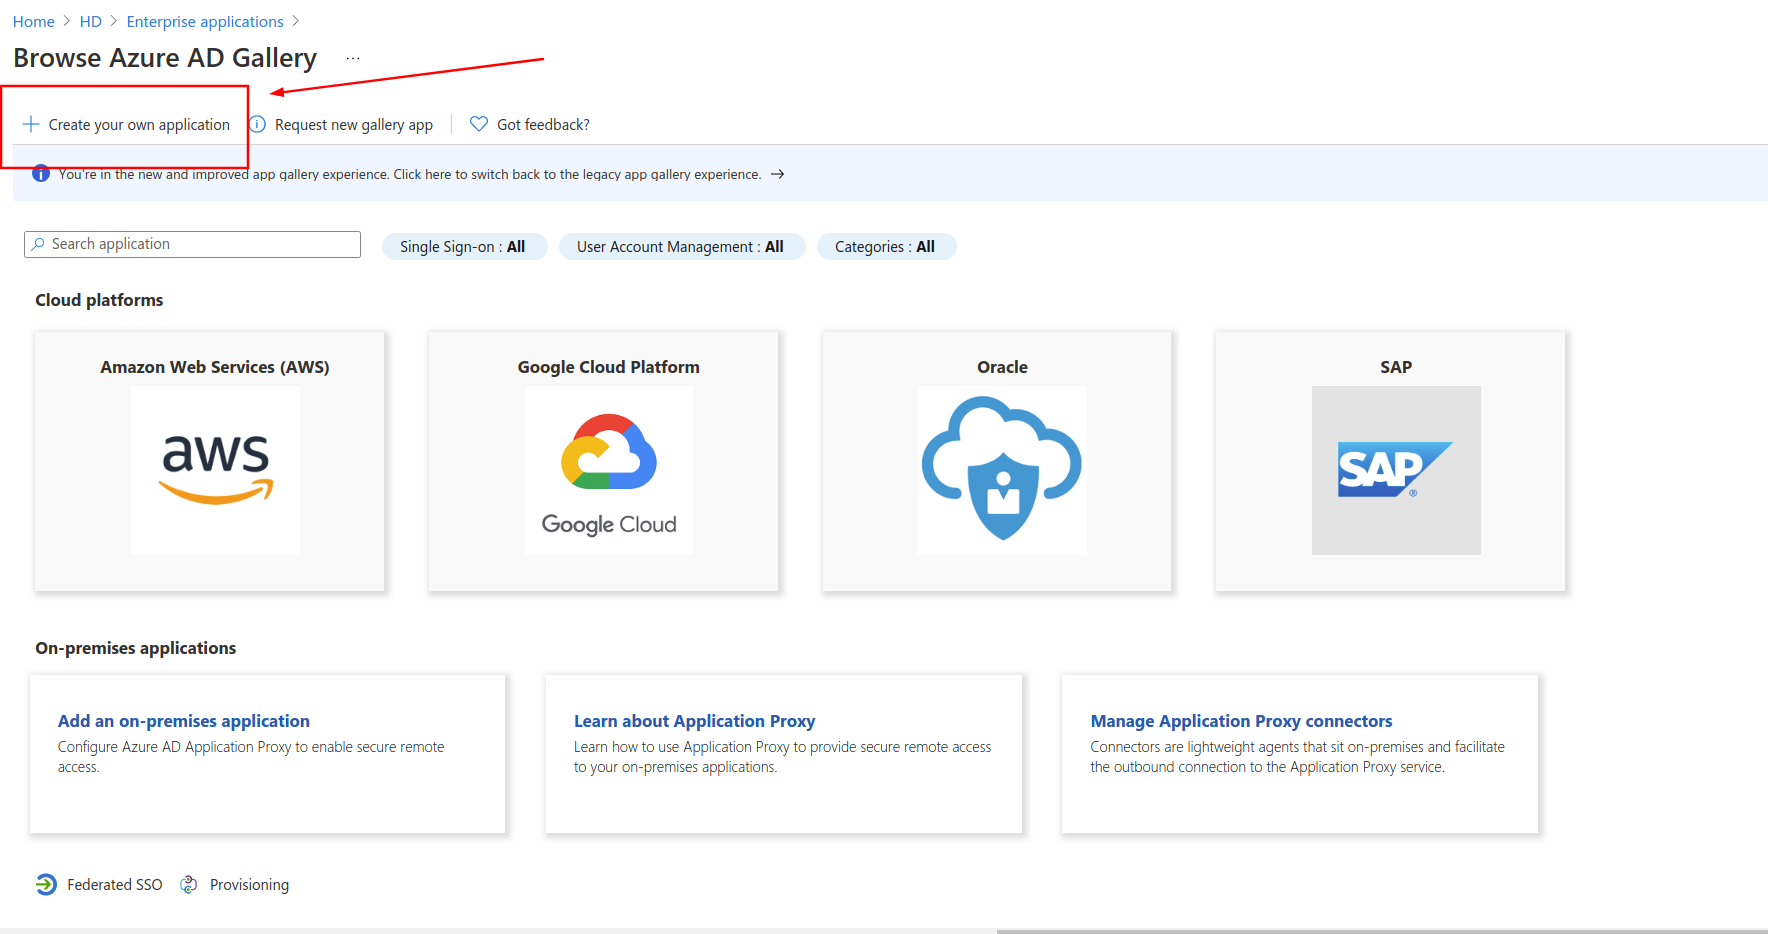
3. Click on Enterprise applications
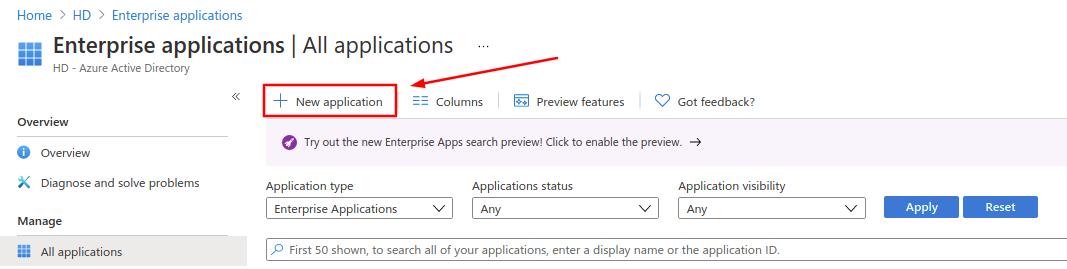
4. Choose New Application
5. Click on Create your own application
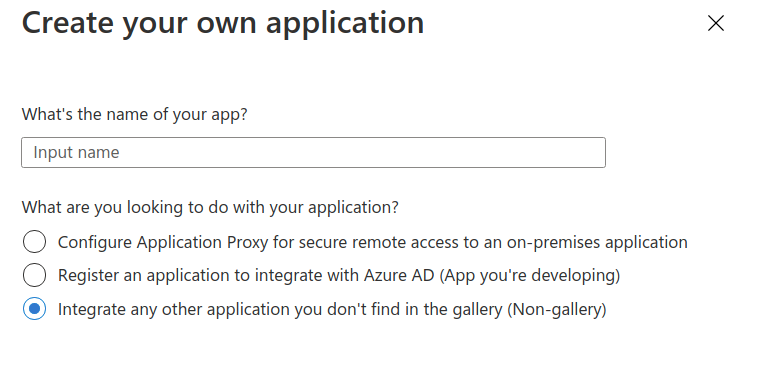
6. Input the name you want for this application and click Create at the bottom. Then wait a few minutes for auto redirect:
Adding Single Sign On
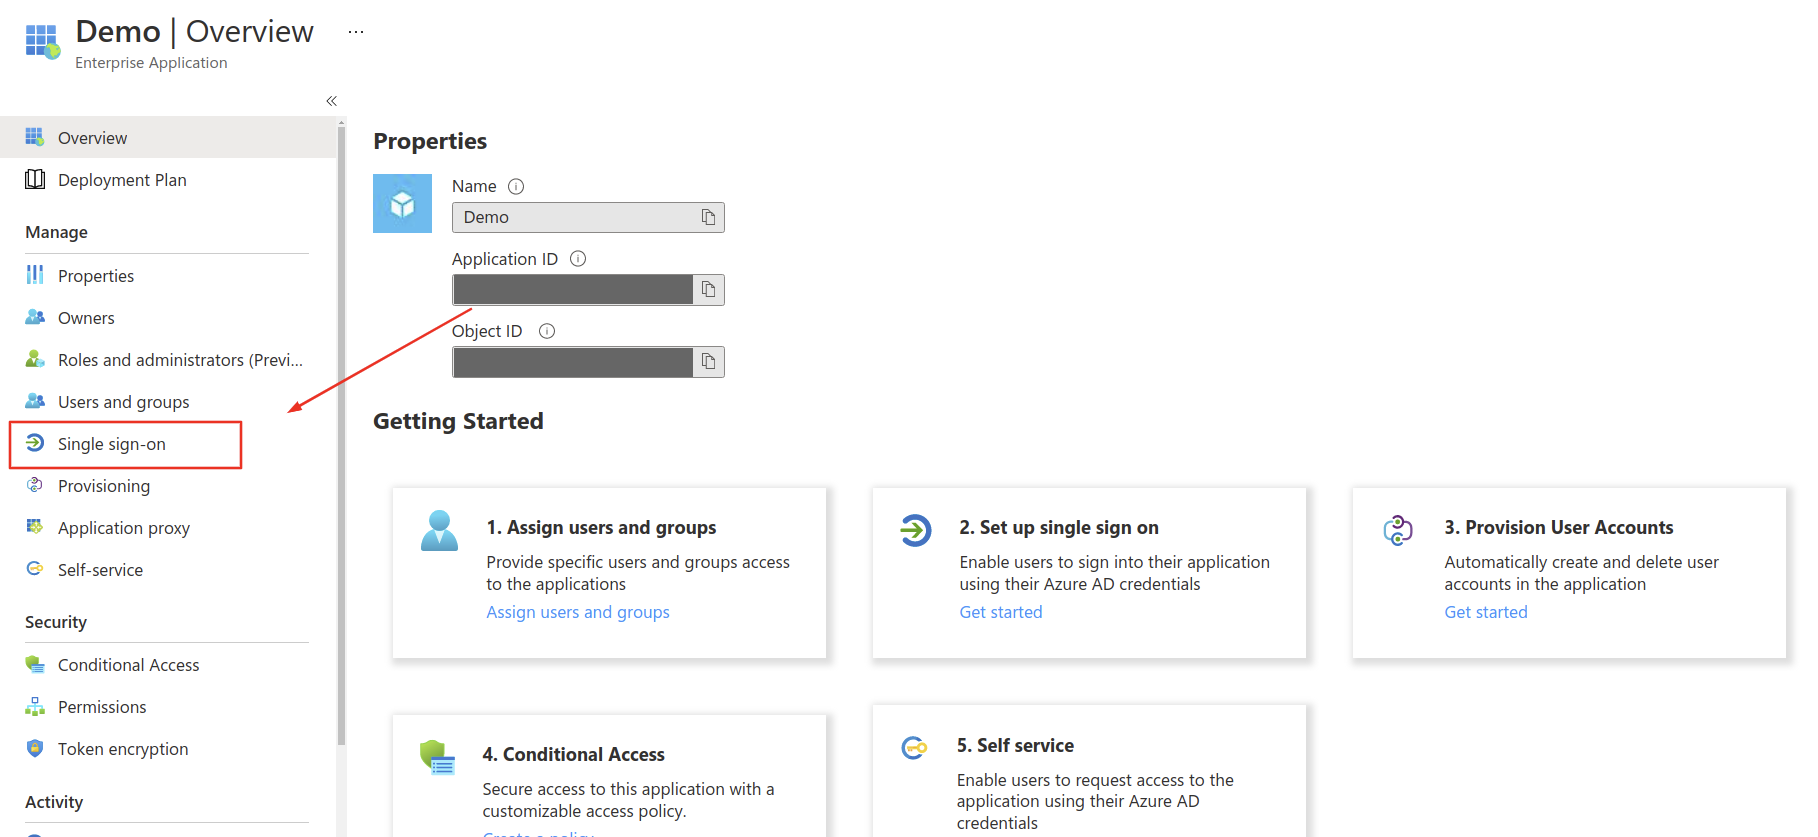
7. Choose Single sign-on.
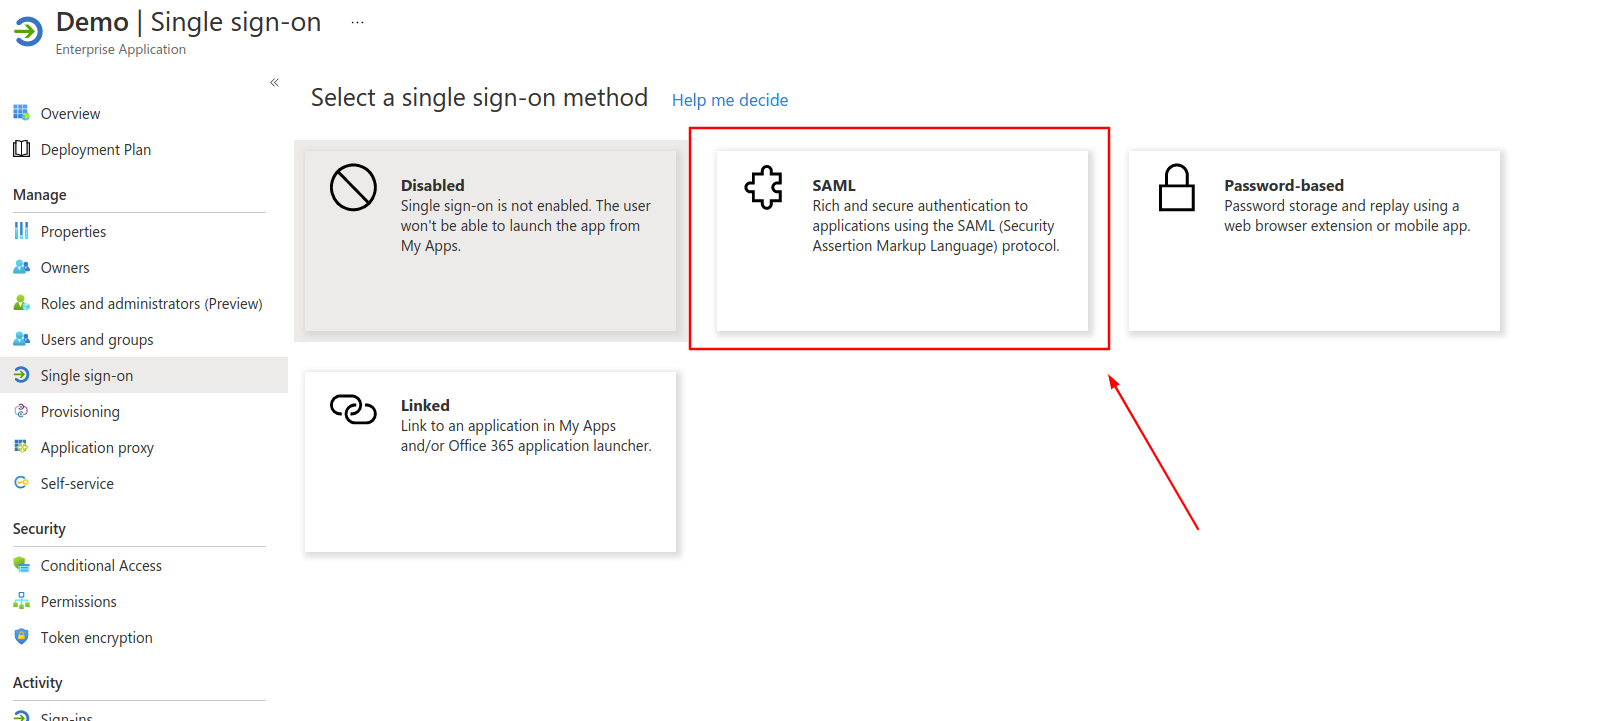
8. Select the SAML option.
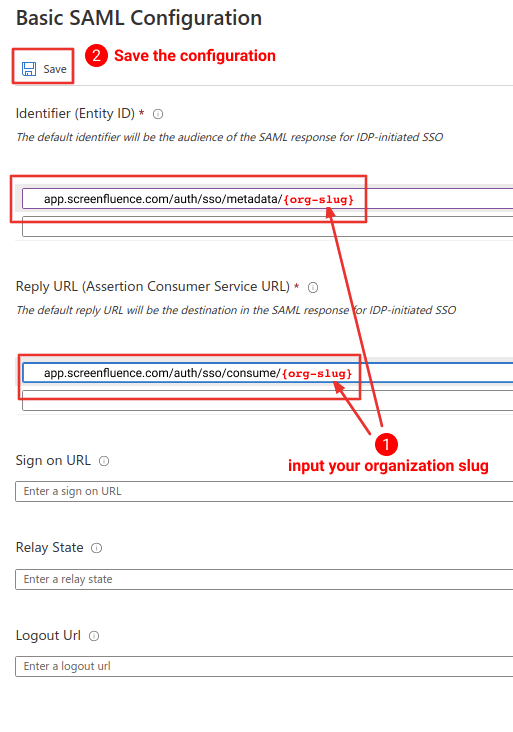
9. Click Edit on the Basic SAML Configuration.

10. Inside the Basic SAML Configuration, first enter your Identifier (Entity ID). The URL will be https://app.screenfluence.com/auth/sso/metadata/{org-slug}. Then enter the Reply URL (Assertion Consumer Service URL) which will be https://app.screenfluence.com/auth/sso/metadata/{org-slug}.
Each organization in screenfluence has a URL-safe name. This {org-slug} can be found by logging in to screenfluence and navigating to Account. Directly below the name of your organization will be the org-slug.
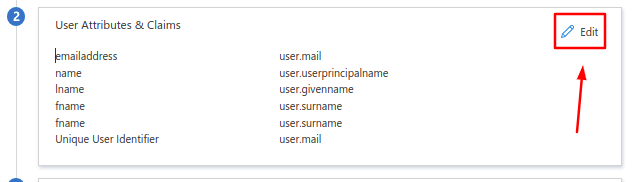
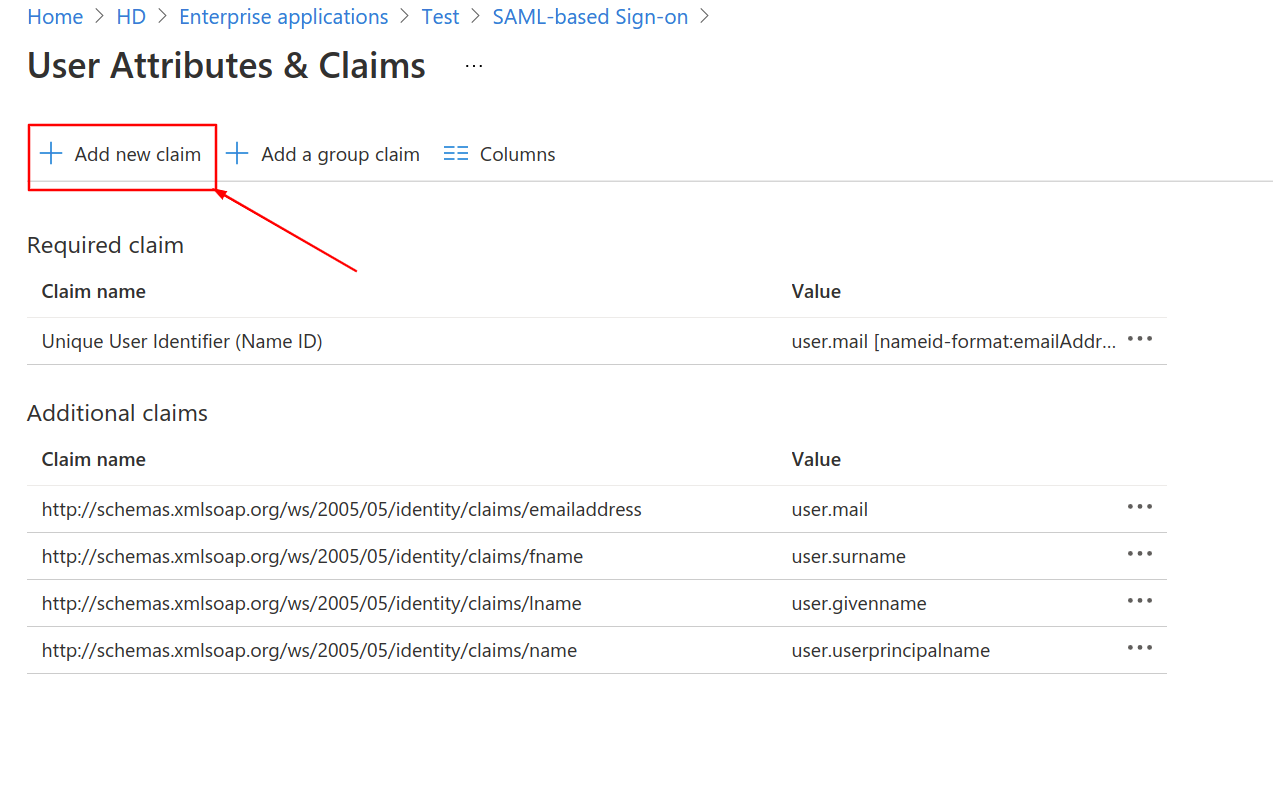
11. Setup Claims
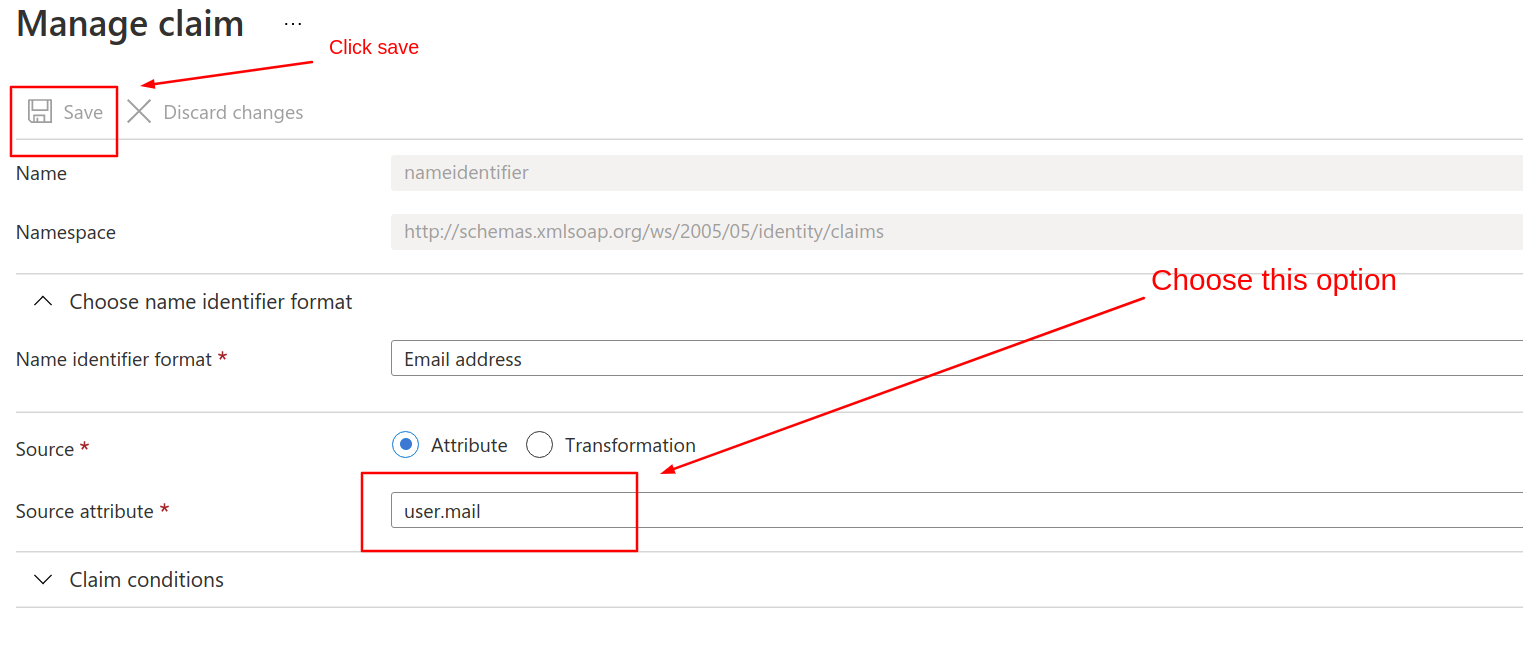
Change the Primary Key as below:
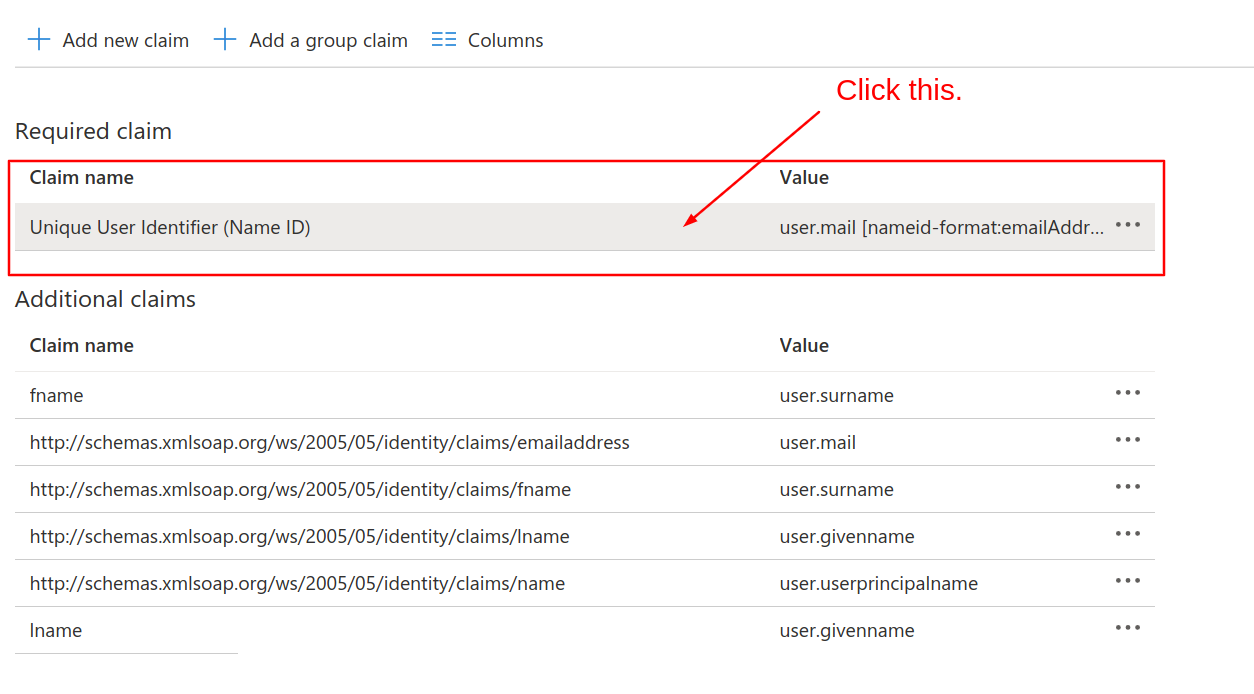
Then create 2 new claims as below:
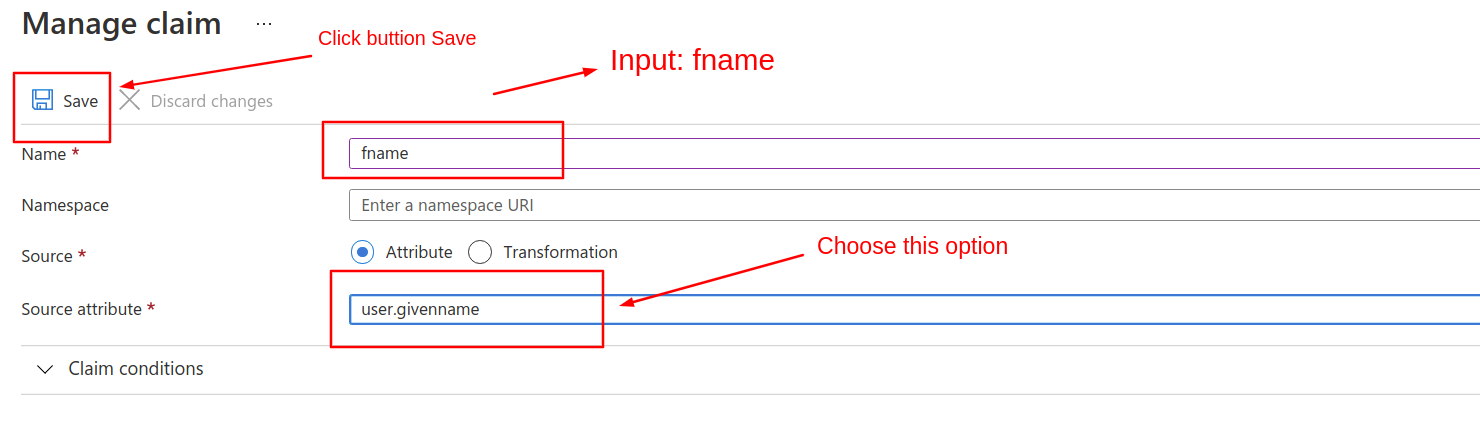
Then input fname in the Name field and select the option user.givenname.
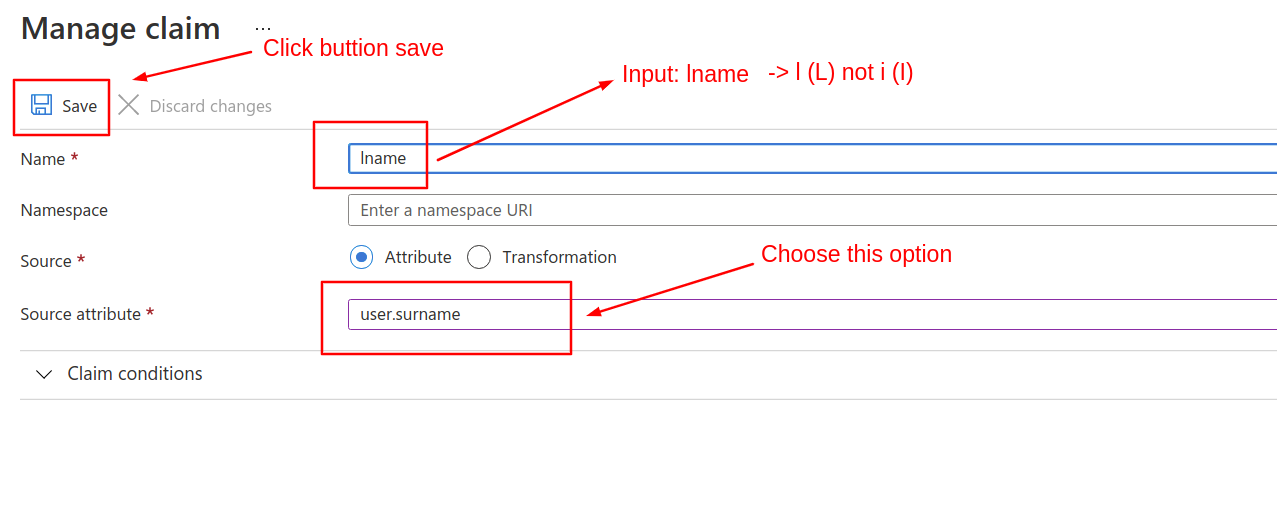
Set up another claim. This one will be input lname in the Name field and select the option user.surname.
Values required by Screenfluence
Screenfluence requires 3 values in order to complete the process to enable SSO for your organization.
- X.509 Certificate Fingerprint
- SSO URL (Identity Provider Single Sign-On URL)
- Issuer (Identity Provider Issuer)
12. In order to get the X.509 Certificate Fingerprint first download the Certificate.
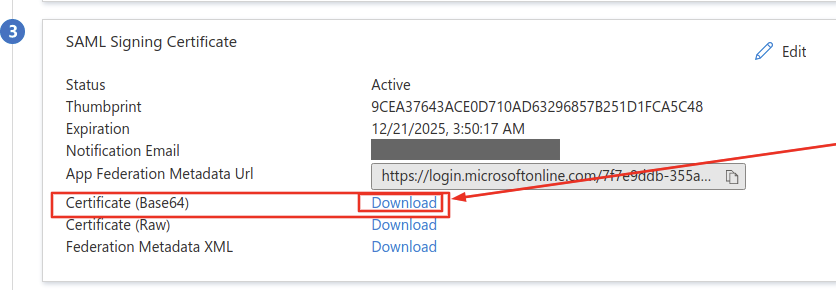
Your certificate should look like this:
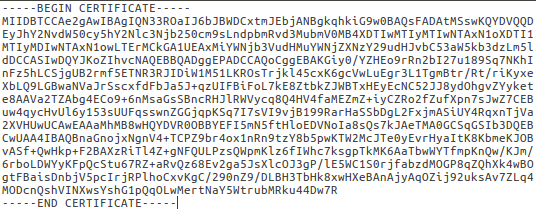
Copy all the text and go to https://www.samltool.com/fingerprint.php
Make sure to Select sha256 and then calculate the fingerprint. Save the Formatted Fingerprint for later. You will need to send this to Screenfluence.

In Azure, the two other required values can be found here:
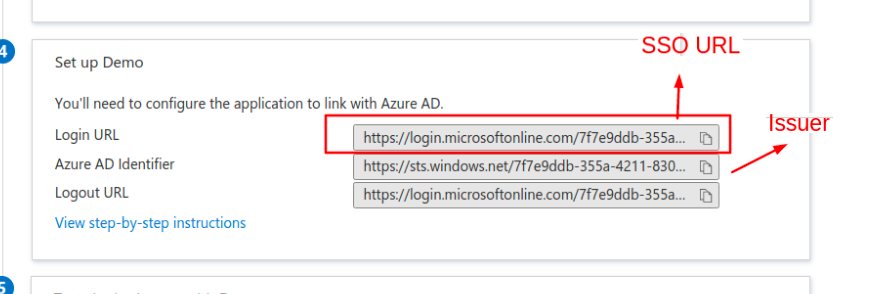
Please send the Issuer, SSO URL, and Certificate Fingerprint to your Screenfluence point of contact and SSO will be enabled shortly thereafter.